
A houseplant with yellow leaves, drooping stems, or brown leaf edges is not necessarily asking for more water. In fact, overwatering is one of the most common reasons indoor plants decline. The difficulty is that both too much and too little water can cause wilting, yellowing, and leaf loss.
The best way to diagnose a watering problem is to look at the soil, the pot, the drainage, and the plant’s overall condition together. This guide explains how to identify common problems and correct them before serious root damage occurs. Proper light exposure also directly influences water uptake; explore our companion guide on How Much Light Do Houseplants Need? to evaluate your plant’s environment.
1. Understand the Difference Between Overwatering and Underwatering
Overwatering does not simply mean giving a plant too much water in one session. It usually means watering too frequently, so the potting mix stays wet for too long.
Roots need both moisture and oxygen. When the soil remains saturated, air spaces fill with water and roots can become damaged. In severe cases, root rot develops.
Underwatering occurs when the plant does not receive enough moisture to replace the water lost through its leaves.
Typical signs include:
Possible overwatering symptoms:
- Yellowing leaves, especially lower or inner leaves
- Soft or mushy stems
- Soil that remains wet for several days longer than expected
- A persistently heavy pot
- A musty smell from the potting mix
- Dark, soft, or decaying roots
Possible underwatering symptoms:
- Dry, crispy leaf edges
- Drooping leaves and stems
- Soil pulling away from the sides of the pot
- A noticeably lightweight container
- Potting mix that feels dry below the surface
These symptoms are clues, not definitive diagnoses. Wilting, for example, can occur with both excessive and insufficient moisture.
2. Check Soil Moisture Before Watering
Do not rely on a fixed watering calendar. A plant that needs water every few days in summer may need it much less frequently during winter.
Watering frequency depends on several factors:
- Plant species and root structure
- Pot size and material
- Potting mix composition
- Light intensity
- Room temperature and humidity
- Season and growth activity
Start by checking the soil approximately 1–2 inches below the surface. The top layer can dry while the root zone remains moist.
For smaller pots, use your finger. For larger containers, a wooden skewer can help you check deeper into the soil.
You can also lift the pot and compare its weight with how it feels after watering. A much lighter container often indicates that the mix has dried considerably.
Using a Soil Moisture Meter
A soil moisture meter provides another way to assess moisture below the surface.
The XLUX Soil Moisture Meter (ASIN: B014MJ8J2U) is designed to help check soil moisture without relying only on the surface appearance of the potting mix.
To use a probe-style meter:
- Insert the probe into the soil according to the manufacturer’s instructions.
- Position it in the root zone, avoiding the plant’s main stem and large roots.
- Check the reading in more than one location if the pot is large.
- Interpret the result together with the soil feel and the plant’s condition.
- Clean and store the meter as instructed after use.
A moisture meter is a diagnostic aid, not an automatic watering instruction. Different potting mixes, salts, and soil conditions can affect readings. If the reading conflicts with what you observe, check the soil manually as well.
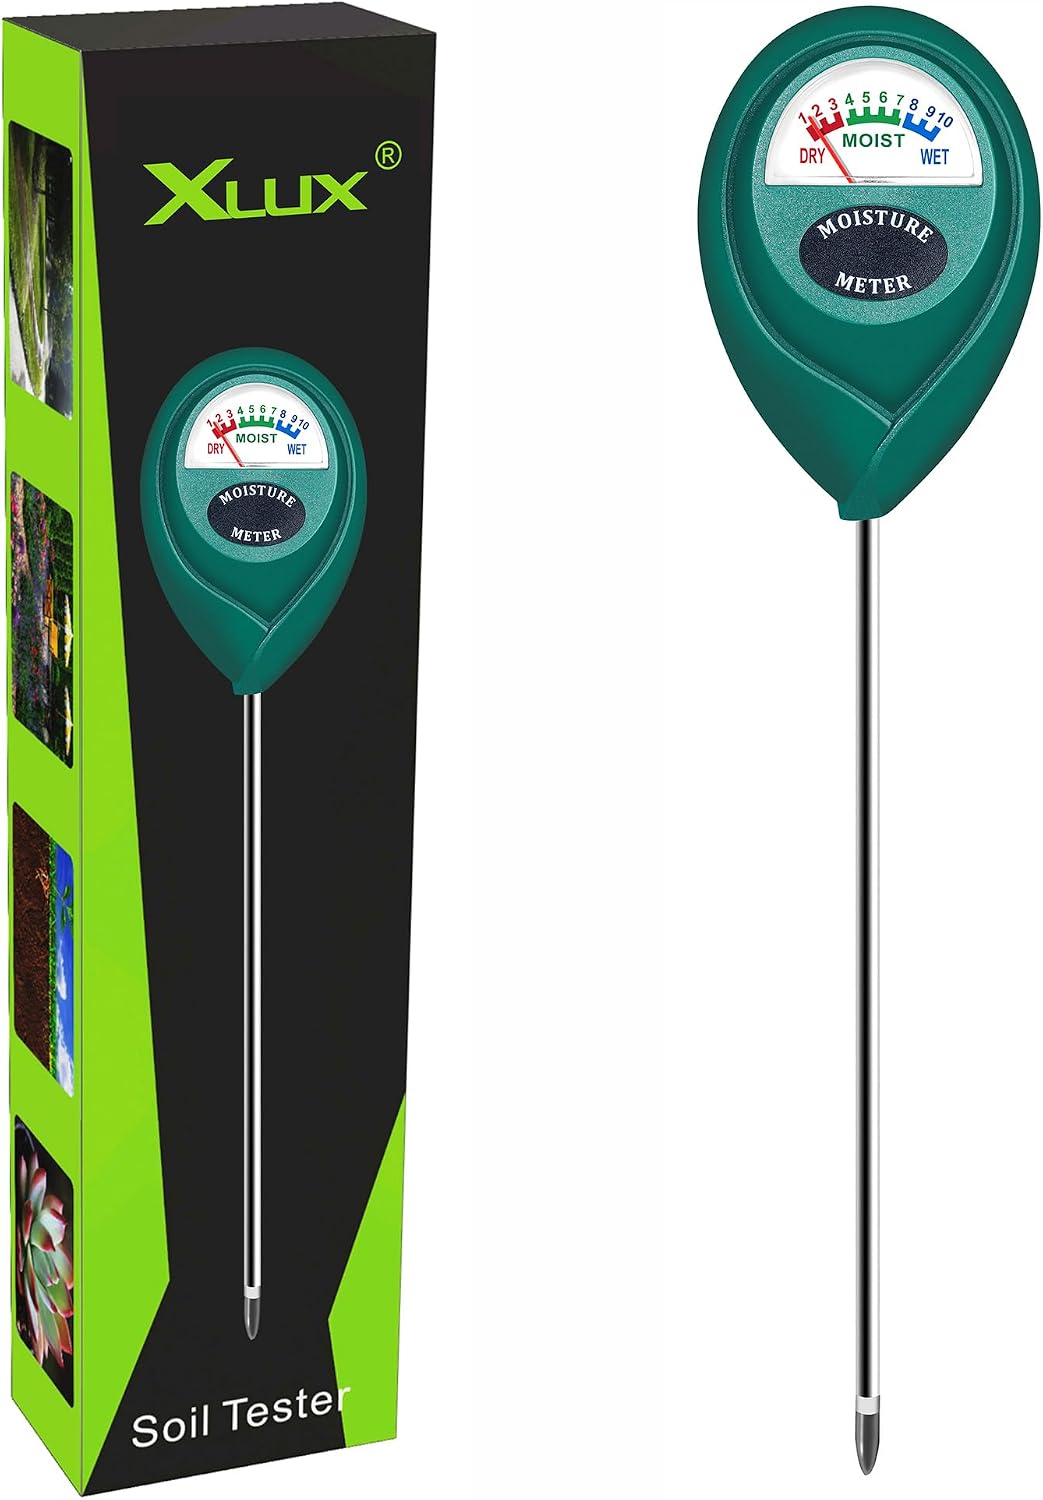
XLUX Soil Moisture Meter
Single-probe analog soil moisture meter designed to give immediate root-zone moisture readings without batteries, helping diagnose overwatering and underwatering in indoor potted plants.
As an Amazon Associate, LifeMode earns from qualifying purchases.
3. Check Whether the Pot Has Proper Drainage
A healthy container needs a way for excess water to escape.
Check the bottom of the pot for drainage holes. Decorative cachepots without holes can trap water around the roots if the plant is placed directly inside them.
A practical arrangement is to keep the plant in a nursery pot with drainage holes and place that pot inside a decorative outer container. Remove the inner pot when watering, allow excess water to drain, and empty the outer container before putting the plant back.
If the plant is already in a pot without drainage, consider repotting it into a suitable container.
Do not assume that a layer of stones at the bottom of a pot solves poor drainage. A suitable potting mix and an unobstructed drainage hole are more important.
4. Water Thoroughly, Then Allow Excess Water to Drain
When a plant actually needs water, apply enough to moisten the root zone rather than repeatedly adding small amounts to the surface.
For most plants that prefer evenly moist but not waterlogged soil:
- Water the potting mix evenly.
- Continue until excess water begins to leave the drainage holes.
- Allow the pot to drain thoroughly.
- Empty the saucer or outer container.
Never leave a typical houseplant standing in collected drainage water for extended periods.
There are exceptions. Some plants prefer consistently moist conditions, while succulents and cacti generally need the potting mix to dry more thoroughly between waterings. Always check the requirements of the particular species.
5. What to Do When Water Runs Straight Through the Pot
If water immediately flows out of the drainage holes, it does not always mean the plant has received enough moisture.
Very dry peat- or bark-based potting mixes can become hydrophobic, meaning they repel water instead of absorbing it evenly. Water may travel down the sides of the pot and escape while the central root zone remains dry.
To check:
- Look for soil pulling away from the pot’s sides.
- Check the moisture deeper in the container.
- Compare the pot’s weight before and after watering.
- Look for dry areas inside the root zone.
If the mix is hydrophobic, apply water slowly in several passes, allowing it time to absorb. For a suitable plant and pot, careful bottom watering can also help rehydrate the mix. Do not leave the pot soaking indefinitely.
If the potting mix has broken down, become compacted, or no longer drains properly, repotting may be necessary.
6. Diagnose Common Houseplant Problems
Yellow Leaves
Yellow leaves can result from overwatering, underwatering, insufficient light, nutrient problems, or natural ageing.
Check the soil before changing the watering routine. If the root zone is consistently wet, reduce watering frequency and inspect drainage. If it is completely dry, water thoroughly and monitor the plant.
Wilting Despite Wet Soil
This is an important warning sign. Roots damaged by prolonged saturation may be unable to absorb water effectively, even when the soil is wet.
Remove the plant from its pot if the symptoms are severe. Healthy roots are generally firm, while rotting roots are often dark, soft, or unpleasant-smelling.
Trim clearly damaged roots with clean tools and repot the plant in fresh, suitable potting mix if enough healthy roots remain.
Brown, Crispy Leaf Edges
Dry soil, low humidity, excess fertiliser salts, and inconsistent watering can all contribute to brown edges.
Check the root-zone moisture first. Also consider whether the plant is close to a heater, air-conditioning outlet, or a window with intense direct sunlight.
Fungus Gnats
Small flying insects around the pot can indicate that the surface of the growing medium stays moist for long periods. Fungus gnats are not proof of overwatering, but persistent dampness can encourage them.
Allow the appropriate plants’ upper soil layers to dry between waterings, remove dead plant material, and avoid leaving water in saucers.
7. When Should You Repot a Houseplant?
Repotting can help when the existing potting mix has become compacted, drainage is poor, or roots have been damaged.
Consider repotting if:
- Water cannot drain freely.
- The mix remains wet for unusually long periods.
- The roots are crowded or growing through drainage holes.
- The potting mix has broken down.
- Root rot has damaged part of the root system.
Choose a container with drainage holes that is only moderately larger than the existing root system. An excessively large pot can hold more moisture than the plant can use.
Use a potting mix appropriate for the plant. A cactus or succulent generally needs a different mix from a tropical foliage plant.
8. Build a Better Watering Routine
A reliable routine is based on observation rather than a calendar.
For each plant:
- Identify its preferred moisture level.
- Check the soil before watering.
- Consider the pot’s weight and drainage.
- Water thoroughly when the plant needs it.
- Empty collected drainage water.
- Observe how quickly the mix dries.
- Adjust the interval as seasons and indoor conditions change.
Keep a simple record if you have many plants. Note the watering date, soil condition, and any visible changes. Over time, this will help you understand the needs of each plant. For broader seasonal home tasks, consult our Master Seasonal Home Checklist.
Final Thoughts
A struggling houseplant does not always need more water. The real problem may be poor drainage, compacted soil, damaged roots, or a watering routine that does not match the plant’s needs.
Check moisture below the surface, make sure excess water can escape, and look at the roots when symptoms persist. A soil moisture meter such as the XLUX can provide an additional reference point, but careful observation remains essential.
The goal is not to water more often. It is to give each plant the right amount of moisture while keeping its roots healthy and properly aerated. Explore our Home & Garden Hub for more practical guides on indoor plants and home gardening.